Hey! Linux lover! Do you know that we can use Termux in graphical interface? If you don’t know, then let me tell you that yes, we can use Termux in graphical user interface version. Do you also want to know how we can use Termux in GUI version? If you want to know and want to use Termux in GUI version, then you are in the right place because in this article, I will explain how to install and use Termux in graphical user interface version. This is going to be exciting, so stay tuned.
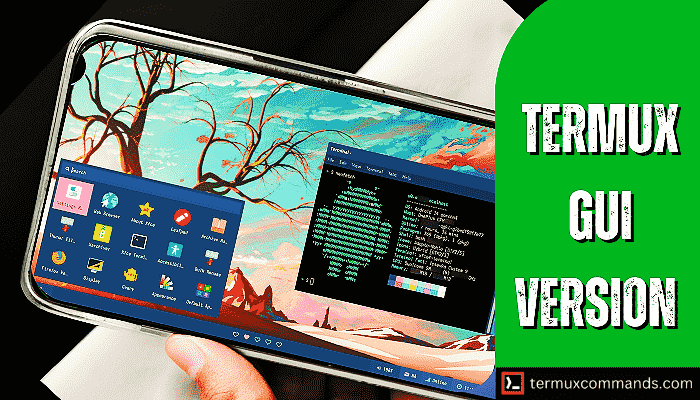
Termux GUI
So basically, Termux is designed for command-line interface (CLI), and there is no official application for accessing its graphical interface version but we can use some packages to achieve the GUI version of Termux. Packages like the VNC server, the desktop environment provider XFCE4, and many moreᅳdon’t worry, we are not going in depth. I will give you some simple steps and some simple commands to do that all and install Termux GUI.
Requirements:
Termux GUI version requirements:
- Termux application
- VNC viewer application
- Data 500 MB
- Free storage 3 GB
Make sure that you have these requirements before installing and using the Termux GUI version.
Steps to Install Termux GUI Version:
Here are some simple steps to install and setup the GUI version of Termux:
STEP 1: Download and install the latest version of Termux from the F-droid store or GitHub.
STEP 2: Open Termux and copy and paste the following commands one by one:
apt update && apt upgrade -y

pkg install git -y

git clone https://github.com/adi1090x/termux-desktop

cd termux-desktop

chmod +x setup.sh

./setup.sh --install
These commands will download and setup the GUI version of Termux in Termux, and this process will take a lot of time, like 30 minutes to 1 hour, depending on your internet speed. If you are facing any problems or errors within the installation and setup process, then re-enter the commands and try it again.
STEP 3: Setup VNC password.
At the end of the installation process, it will ask you to setup a VNC server password.

The password is not visible to you when you are typing. Enter atleast 6-character password and remember the password because you will need to enter this password when you connect to the VNC viewer application.
STEP 4: Start VNC server.
Restart your Termux and enter ($ startdesktop ) command to start VNC server.

Copy this localhost:1 this will be your address in the VNC viewer application.
STEP 5: Connect to VNC viewer.
Open the VNC viewer application and click on the plus button at the bottom right corner.
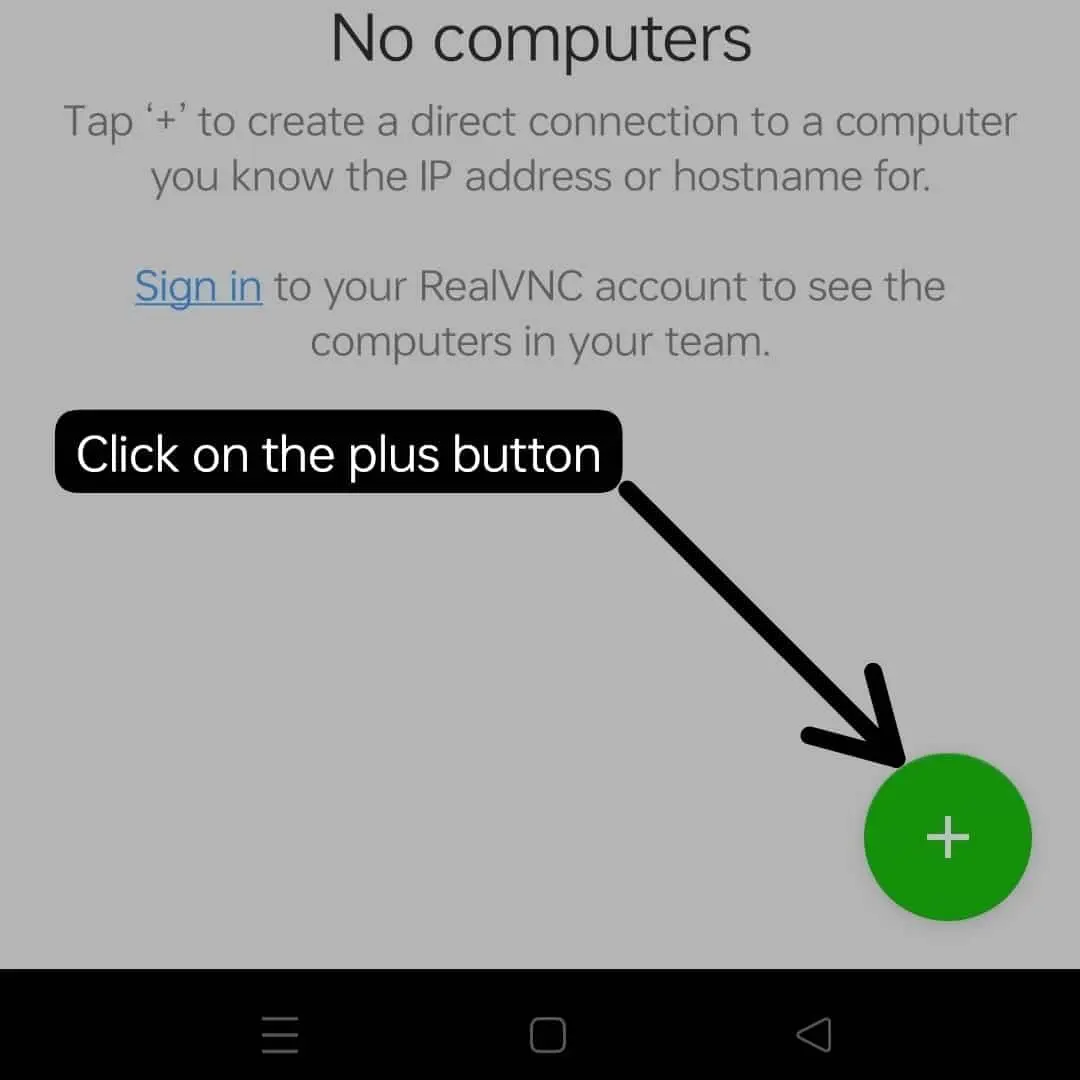
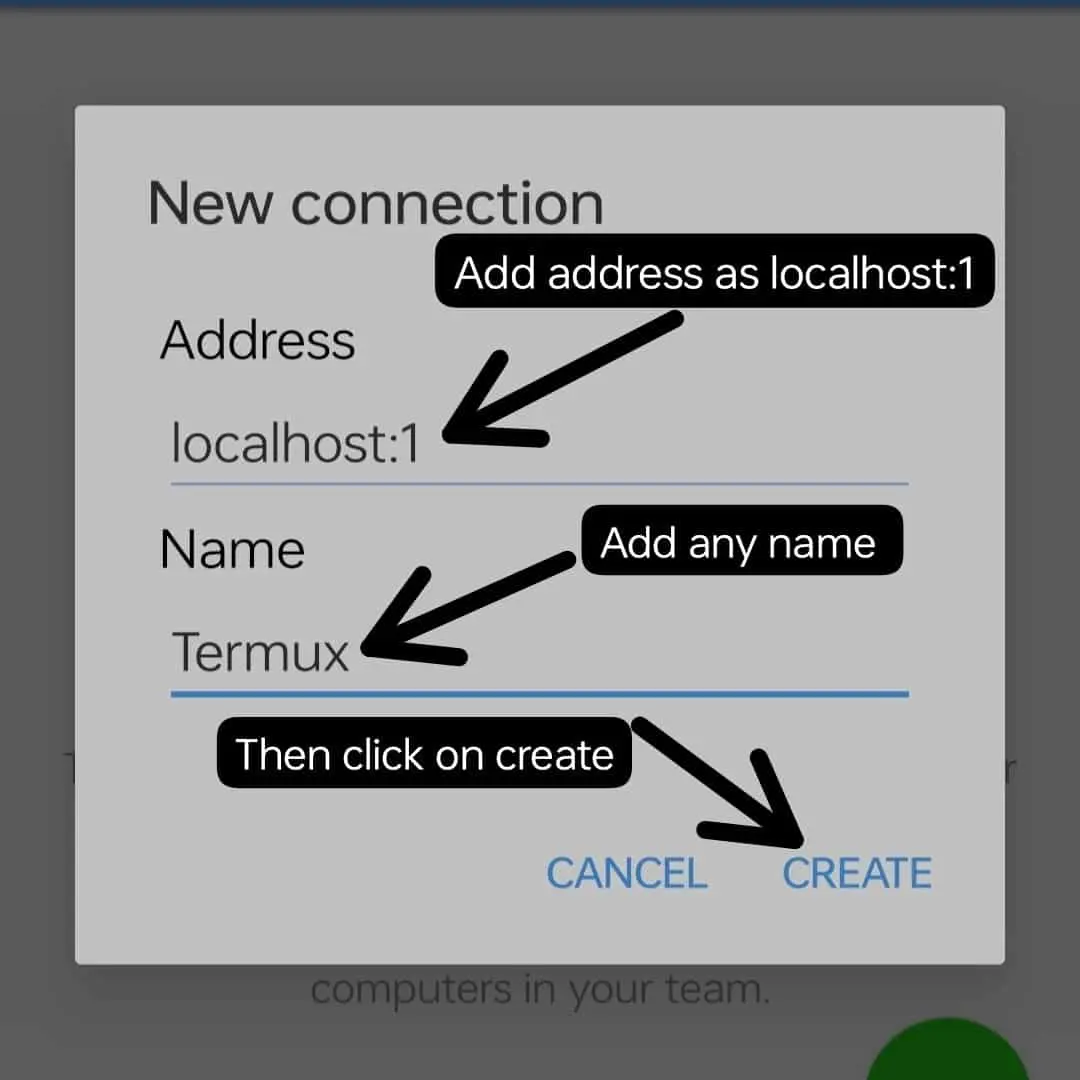
Add address as localhost:1 and add any name then click on create
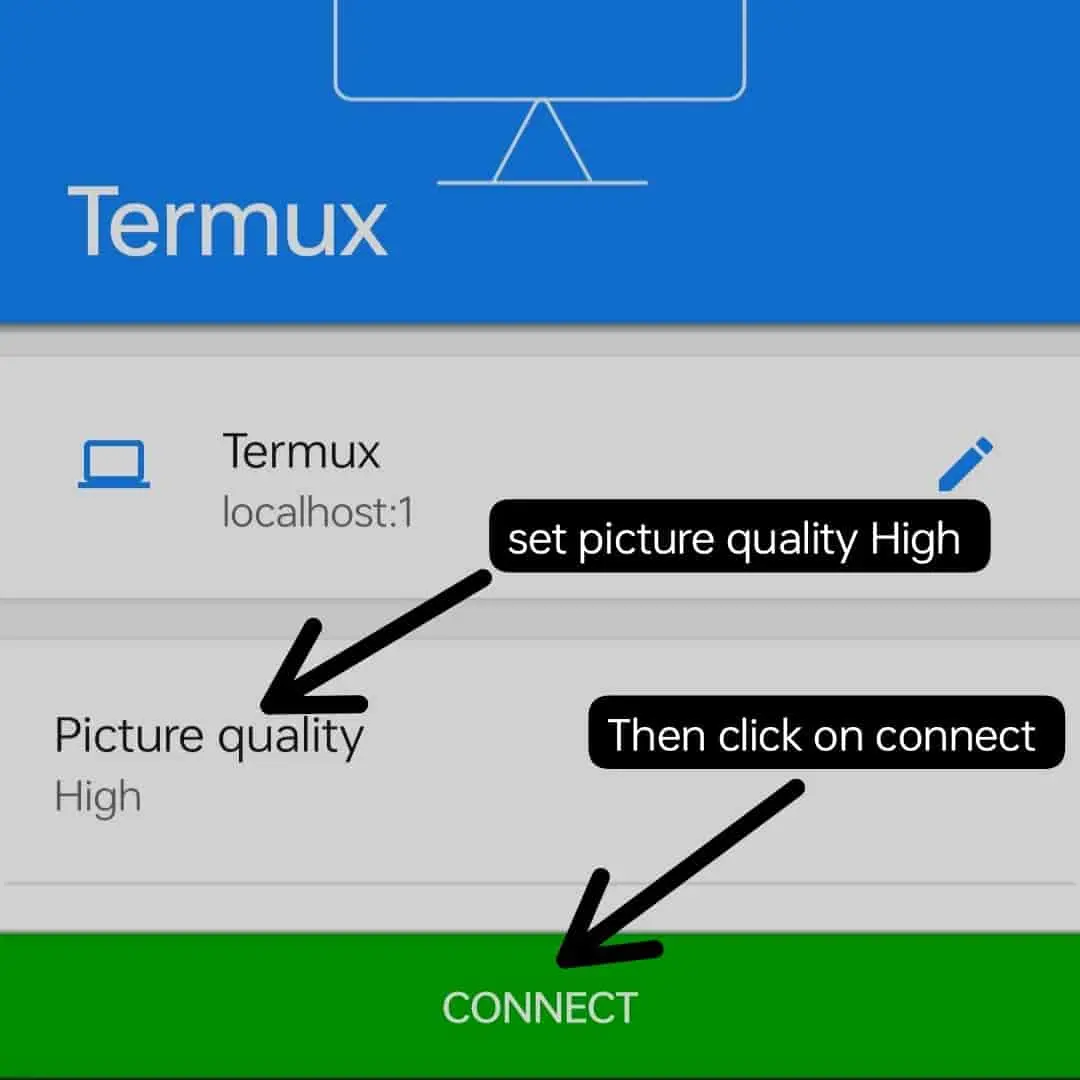
set picture quality High then click on connect.
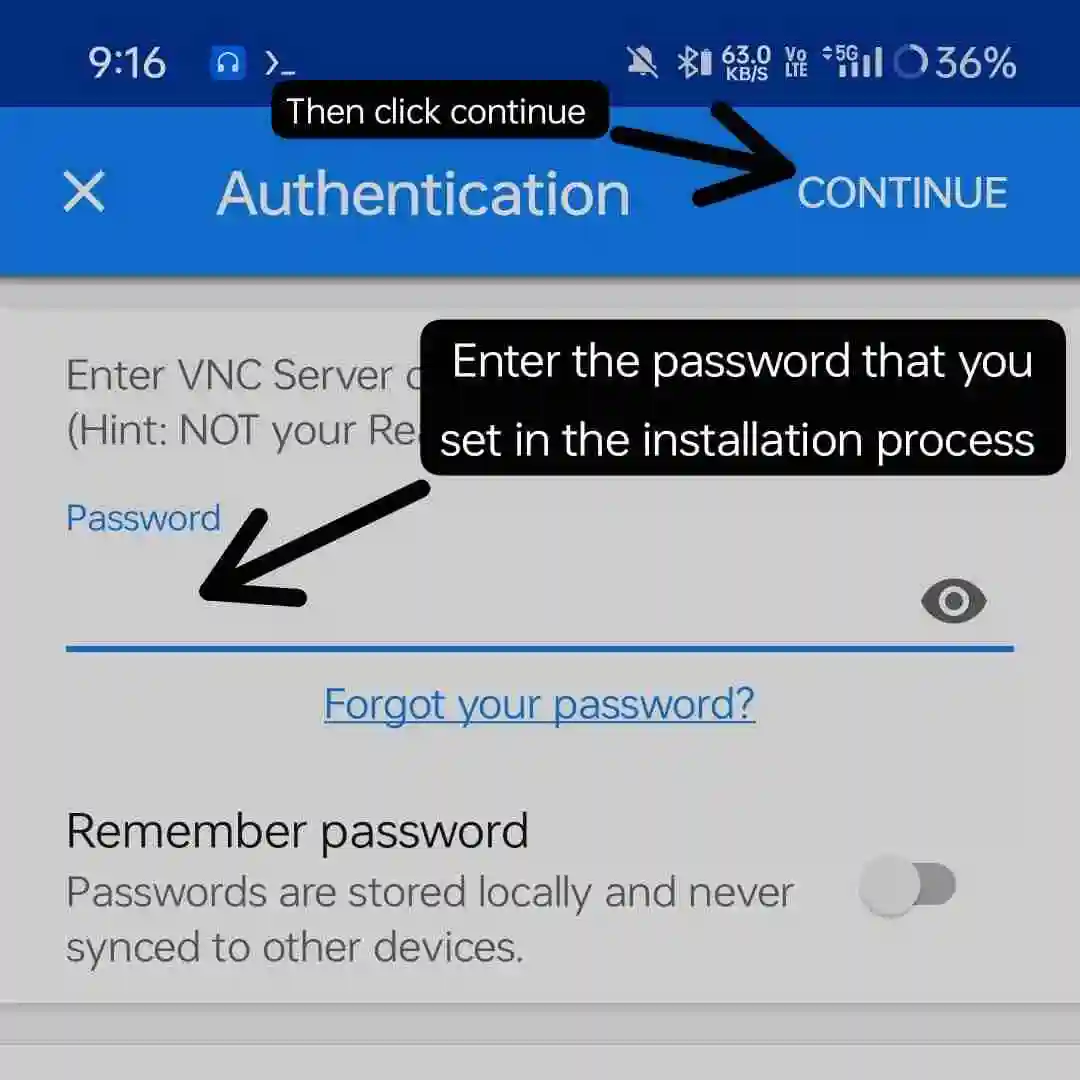
Enter the password that you set in the installation process and click on continue.
Congratulations! You have successfully installed the GUI version of Termux.
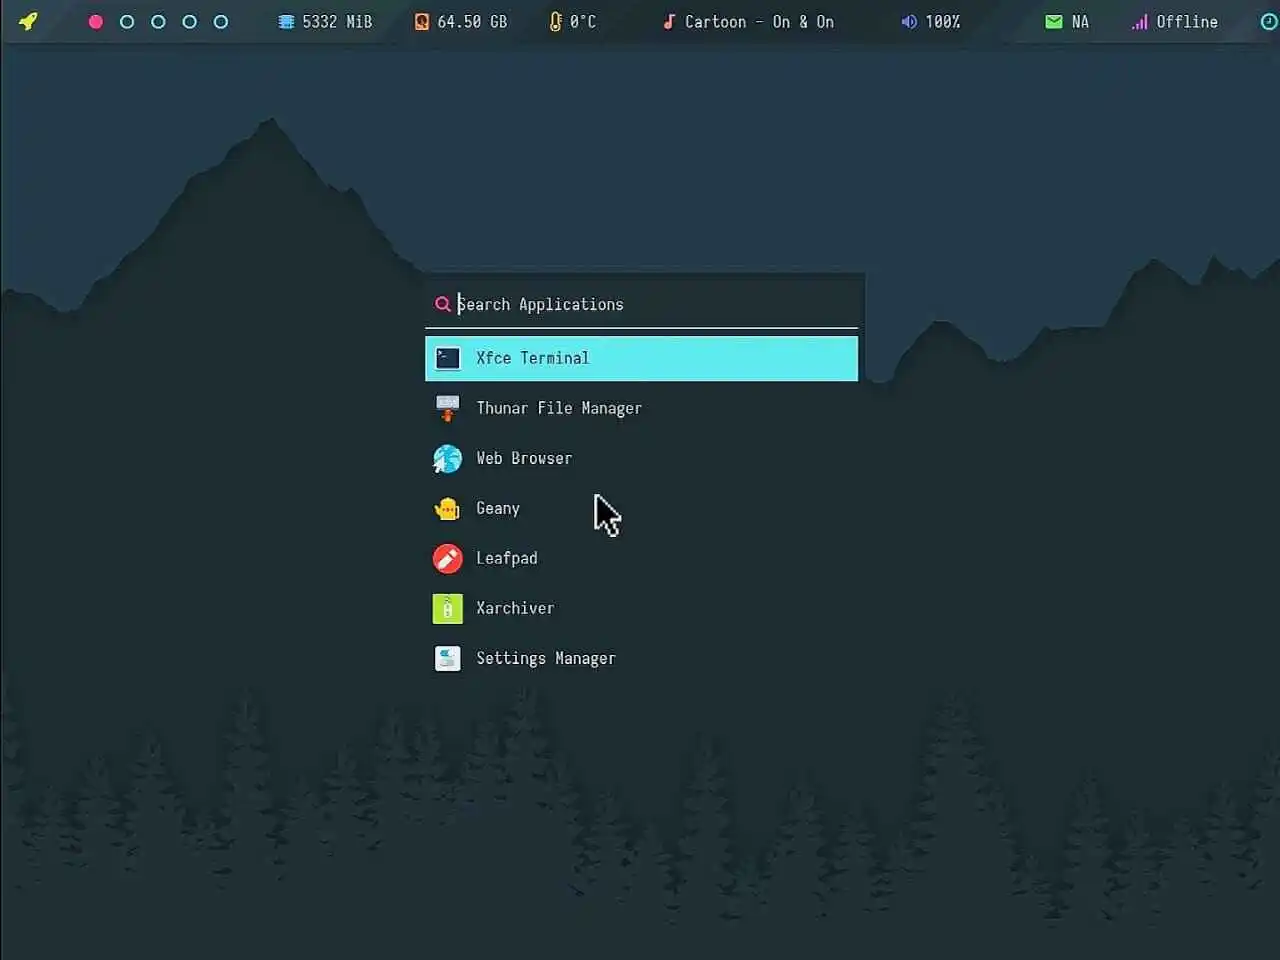
First look:
how to uninstall Termux GUI version?
If you want to uninstall and delete the Termux GUI version files and packages, then run the following commands:
cd termux-desktop

./setup.sh --uninstall
Conclusion:
In this article, we learn about the Termux GUI version. We install and run the GUI version of Termux in just a few simple steps. Installing the GUI version of Termux will provide you with a graphical interface for tools and packages. You can change the theme, fonts, wallpaper, and launcher, and there are more customisation options available. You can also use web browsers like Mozilla Firefox, DuckDuckGo, and more. This GUI version comes with text editors like Nano and Vim. The main thing is that the GUI runs smoothly. This is the all-rounder GUI OS for you; you will love it.
FAQ:
how to install gui in termux?
You can use this single line command to install GUI in Termux:
apt update && apt upgrade -y && pkg install git -y && git clone https://github.com/adi1090x/termux-desktop && cd termux-desktop && chmod +x setup.sh && ./setup.sh --install
after that, download and install vnc viewer and connect it.


